Sidewalk Sleever Horizontal / Vertical Boring Tool


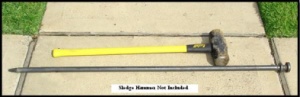
Sidewalk Sleever Model SS-5740
| Characteristics |
| Overall Length | 60" |
| Sleeve Length | 57" |
| Sleeve Diameter | 1" |
| Capable of installing |
1" sch. 40 & class irrigation pipe. 1" Electrical Conduit |
| Head Size | 2" |
| Material | Tool Steel |
| Weight | 15 lbs |
| Key Benefits |
|
Installation Time: * Soil conditions and experience can determine actual time |
How It Works:
Step 
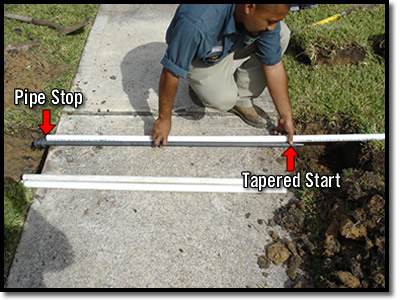
Place a piece of pipe next to the Sidewalk Sleever with one end touching the “pipe stop” and mark, with your finger, where the pipe just meets the tapered end. Then cut the pipe at that point. If the pipe is past the tapered end this will allow dirt to enter the pipe during installation.
Step 
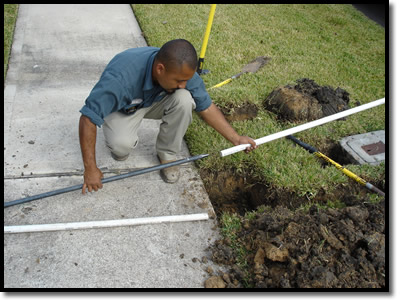
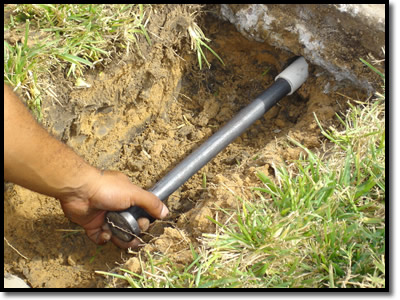
Take the cut pipe (sleeve) and slide it on the Sidewalk Sleever. It is important that the Sidewalk Sleever is clean. Dirt on the tool will make extracting the tool difficult.
Step 
Place the Sidewalk Sleever just under the concrete and tap in a few inches. This will allow the tool to hold itself off the ground making it easier to install and also easier to remove the tool after installation.
Step 
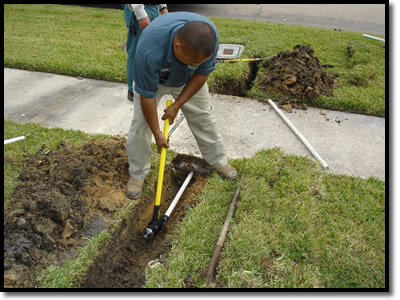
While straddling the trench, use a 16 pound sledge hammer to impact the Sidewalk Sleever under the sidewalk. Continue impacting the tool until the tapered end appears at the other end.
Step 
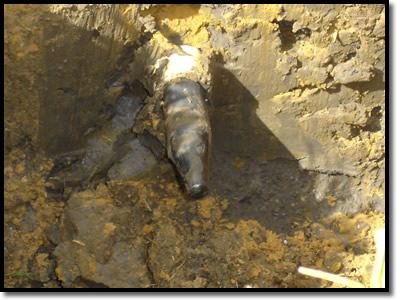
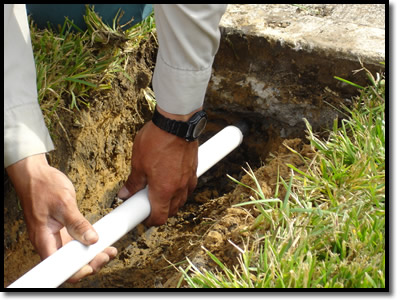
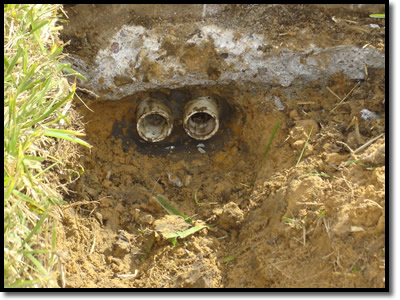
Once the tool and pipe are visible at the other end, simply grab the impacted end of the tool and remove from the installed pipe. If neccessary, tap the pointed end of the tool with the hammer to help the sidewalk sleever slide out of the pipe.
You are now done!!
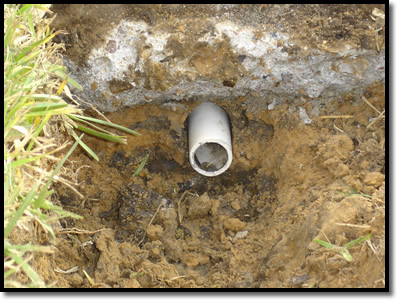
Although soil conditions and experience can determine the speed of the installation, in the example here, the pipe was installed in under 60 seconds. Once the pipe is installed, you can glue on to the pipe and continue running pipe, place a smaller size pipe through the installed pipe or you can use the installed pipe as a sleeve for wires. If more sleeves are needed, just simply repeat the steps and install as many pipes as needed.
Due to the unique size and shape of this item, a $35.00 special shipping charge is added to this item.
")
")


")
")
")

If you've already bought this product, please sign in and add your own review!